

![]()
- 03/18/2021
- 9 minutes to read
In this article
This article shows you how to migrate on-premises Hyper-V VMs to Azure with the Azure Migrate:Server Migration tool.
This tutorial is the third in a series that demonstrates how to assess and migrate machines to Azure.
Note
Tutorials show you the simplest deployment path for a scenario so that you can quickly set up a proof-of-concept. Tutorials use default options where possible, and don’t show all possible settings and paths.
In this tutorial, you learn how to:
- Add the Azure Migrate:Server Migration tool.
- Discover VMs you want to migrate.
- Start replicating VMs.
- Run a test migration to make sure everything’s working as expected.
- Run a full VM migration.
If you don’t have an Azure subscription, create a free account before you begin.
Prerequisites
Before you begin this tutorial, you should:
- Review the Hyper-V migration architecture.
- Review Hyper-V host requirements for migration, and the Azure URLs to which Hyper-V hosts and clusters need access for VM migration.
- Review the requirements for Hyper-V VMs that you want to migrate to Azure.
- We recommend that you assess Hyper-V VMs before migrating them to Azure, but you don’t have to.
- Go to the already created project or create a new project
- Verify permissions for your Azure account – Your Azure account needs permissions to create a VM, and write to an Azure managed disk.
Download and install the provider
For migrating Hyper-V VMs, Azure Migrate:Server Migration installs software providers (Microsoft Azure Site Recovery provider and Microsoft Azure Recovery Service agent) on Hyper-V Hosts or cluster nodes. Note that the Azure Migrate appliance isn’t used for Hyper-V migration.
-
In the Azure Migrate project > Servers, in Azure Migrate: Server Migration, click Discover.
-
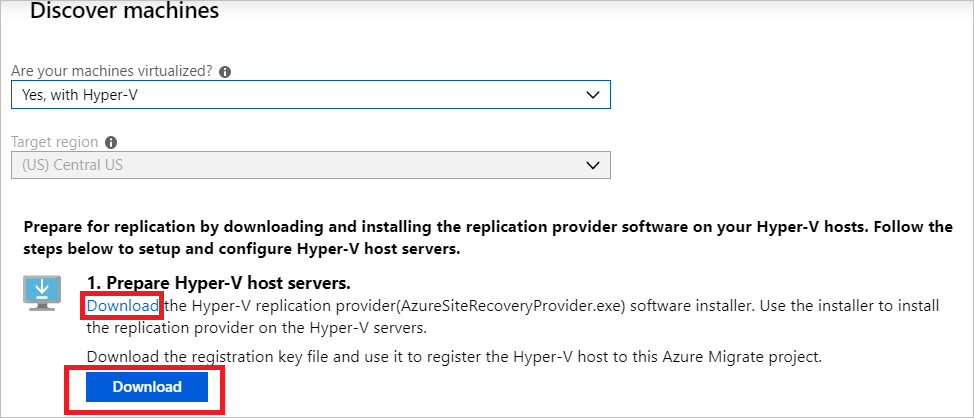
In Discover machines > Are your machines virtualized?, select Yes, with Hyper-V.
-
In Target region, select the Azure region to which you want to migrate the machines.
-
Select Confirm that the target region for migration is region-name.
-
Click Create resources. This creates an Azure Site Recovery vault in the background.
- If you’ve already set up migration with Azure Migrate Server Migration, this option won’t appear since resources were set up previously.
- You can’t change the target region for this project after clicking this button.
- All subsequent migrations are to this region.
-
In Prepare Hyper-V host servers, download the Hyper-V Replication provider, and the registration key file.
- The registration key is needed to register the Hyper-V host with Azure Migrate Server Migration.
- The key is valid for five days after you generate it.
-
Copy the provider setup file and registration key file to each Hyper-V host (or cluster node) running VMs you want to replicate.
-
Run the provider setup file on each host, as described in the next procedure.
-
After installing the provider on hosts, in Discover machines, click Finalize registration.
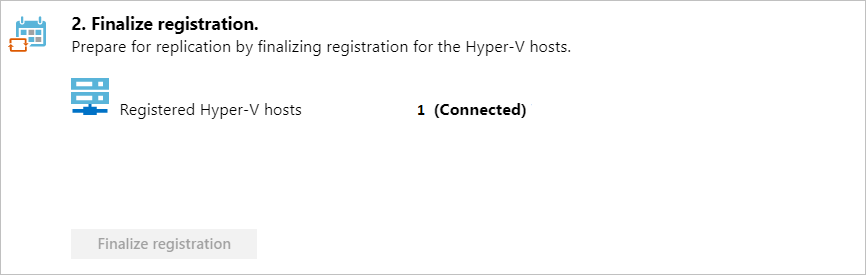
It can take up to 15 minutes after finalizing registration until discovered VMs appear in Azure Migrate Server Migration. As VMs are discovered, the Discovered servers count rises.
Replicate Hyper-V VMs
With discovery completed, you can begin replication of Hyper-V VMs to Azure.
Note
You can replicate up to 10 machines together. If you need to replicate more, then replicate them simultaneously in batches of 10.
-
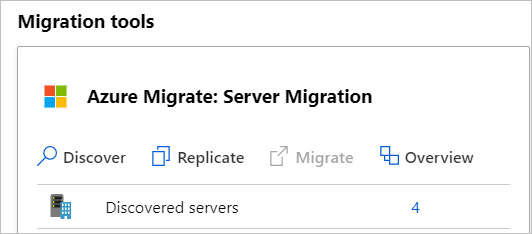
In the Azure Migrate project > Servers, Azure Migrate: Server Migration, click Replicate.
-
In Replicate, > Source settings > Are your machines virtualized?, select Yes, with Hyper-V. Then click Next: Virtual machines.
-
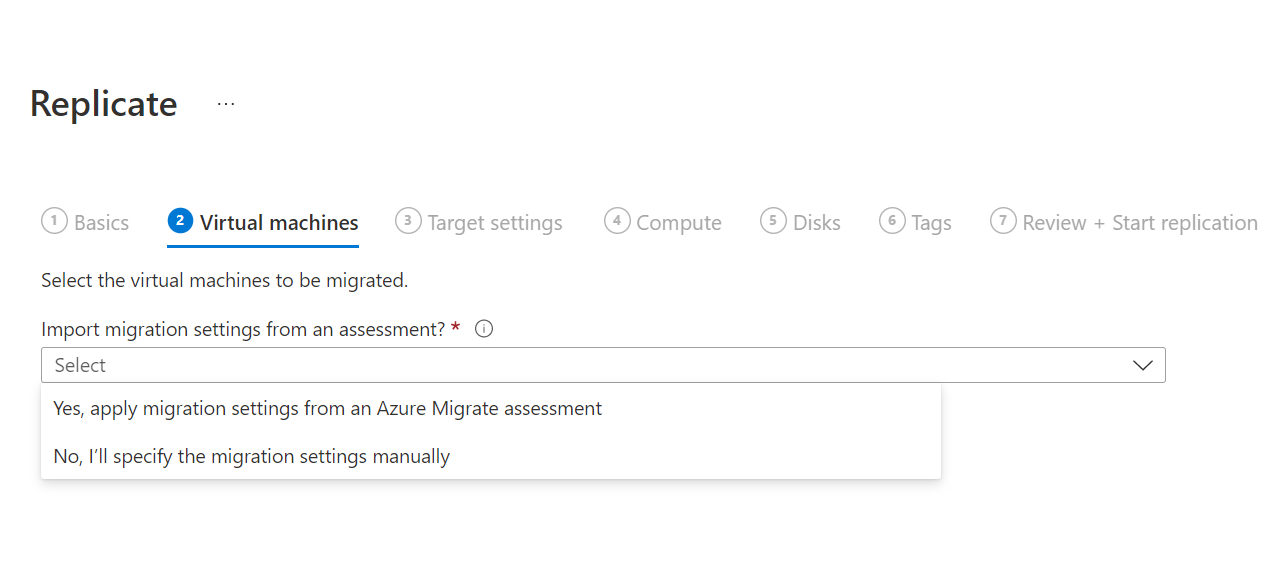
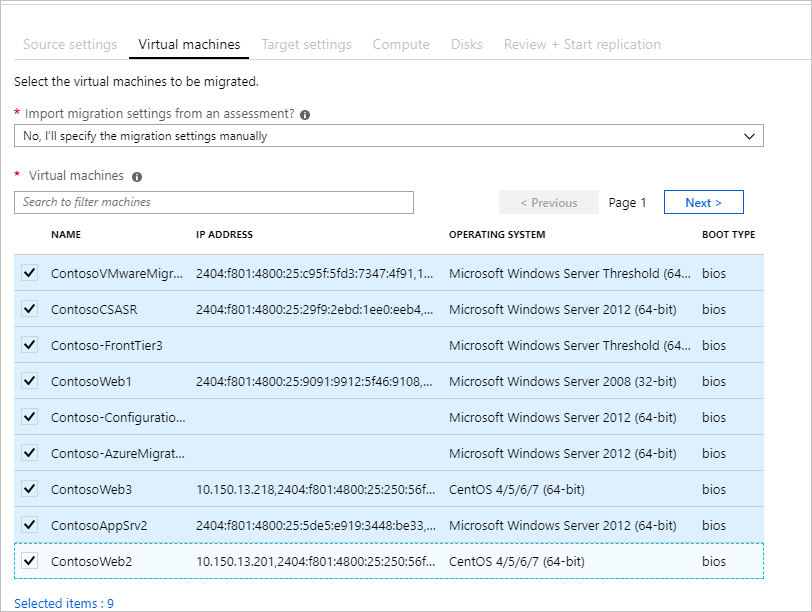
In Virtual machines, select the machines you want to replicate.
-
If you’ve run an assessment for the VMs, you can apply VM sizing and disk type (premium/standard) recommendations from the assessment results. To do this, in Import migration settings from an Azure Migrate assessment?, select the Yes option.
-
If you didn’t run an assessment, or you don’t want to use the assessment settings, select the No options.
-
If you selected to use the assessment, select the VM group, and assessment name.
-
-
In Virtual machines, search for VMs as needed, and check each VM you want to migrate. Then, click Next: Target settings.
-
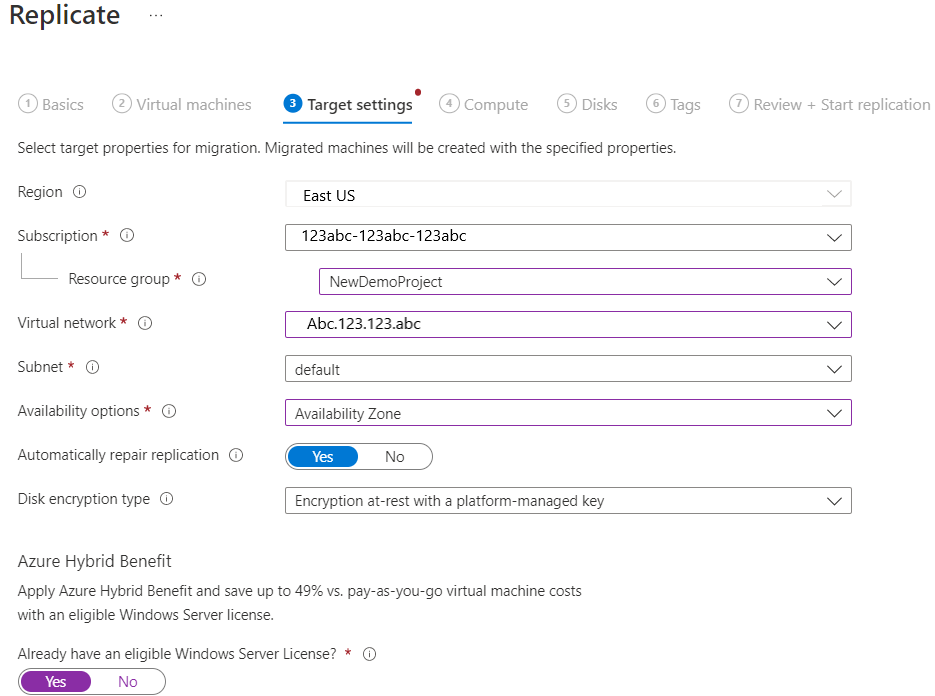
In Target settings, select the target region to which you’ll migrate, the subscription, and the resource group in which the Azure VMs will reside after migration.
-
In Replication Storage Account, select the Azure Storage account in which replicated data will be stored in Azure.
-
Virtual Network, select the Azure VNet/subnet to which the Azure VMs will be joined after migration.
-
In Availability options, select:
- Availability Zone to pin the migrated machine to a specific Availability Zone in the region. Use this option to distribute servers that form a multi-node application tier across Availability Zones. If you select this option, you’ll need to specify the Availability Zone to use for each of the selected machine in the Compute tab. This option is only available if the target region selected for the migration supports Availability Zones
- Availability Set to place the migrated machine in an Availability Set. The target Resource Group that was selected must have one or more availability sets in order to use this option.
- No infrastructure redundancy required option if you don’t need either of these availability configurations for the migrated machines.
-
In Azure Hybrid Benefit:
- Select No if you don’t want to apply Azure Hybrid Benefit. Then, click Next.
- Select Yes if you have Windows Server machines that are covered with active Software Assurance or Windows Server subscriptions, and you want to apply the benefit to the machines you’re migrating. Then click Next.
-
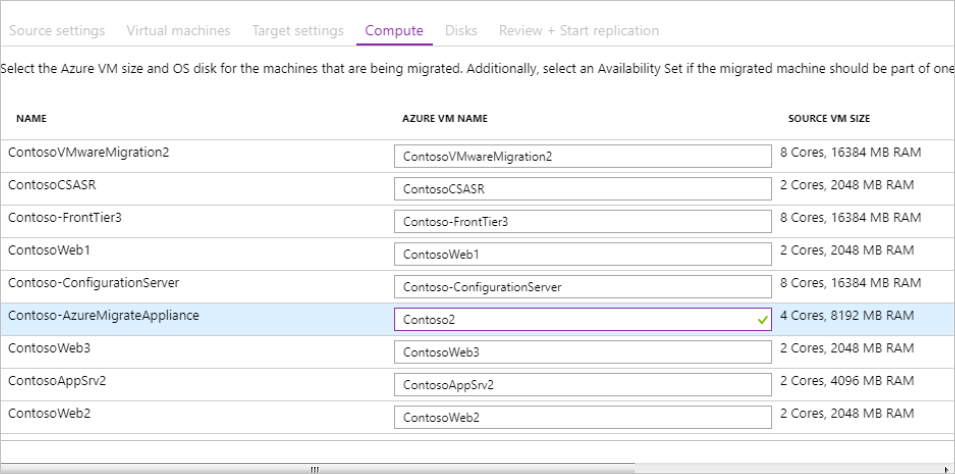
In Compute, review the VM name, size, OS disk type, and availability configuration (if selected in the previous step). VMs must conform with Azure requirements.
- VM size: If you’re using assessment recommendations, the VM size dropdown will contain the recommended size. Otherwise Azure Migrate picks a size based on the closest match in the Azure subscription. Alternatively, pick a manual size in Azure VM size.
- OS disk: Specify the OS (boot) disk for the VM. The OS disk is the disk that has the operating system bootloader and installer.
- Availability Set: If the VM should be in an Azure availability set after migration, specify the set. The set must be in the target resource group you specify for the migration.
-
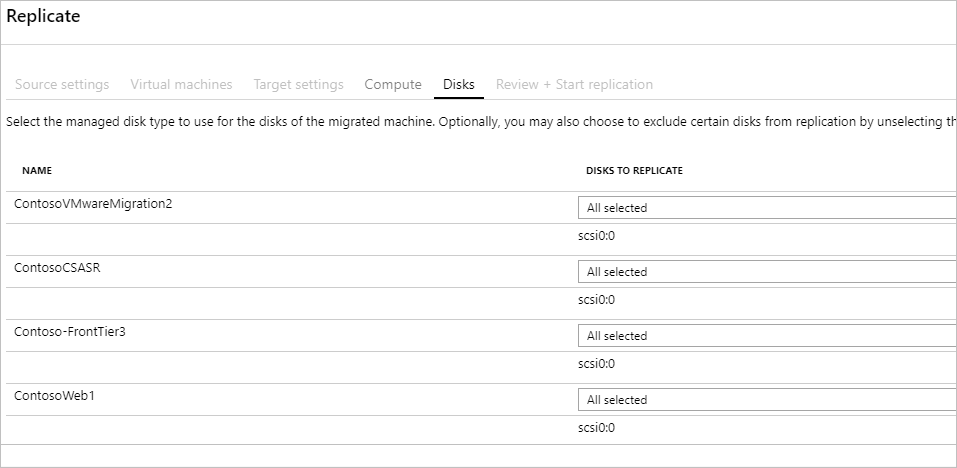
In Disks, specify the VM disks that needs to be replicated to Azure. Then click Next.
- You can exclude disks from replication.
- If you exclude disks, won’t be present on the Azure VM after migration.
-
In Review and start replication, review the settings, and click Replicate to start the initial replication for the servers.
Note
You can update replication settings any time before replication starts, in Manage > Replicating machines. Settings can’t be changed after replication starts.
Provision for the first time
If this is the first VM you’re replicating in the Azure Migrate project, Azure Migrate: Server Migration automatically provisions these resources in same resource group as the project.
- Cache storage account: The Azure Site Recovery provider software installed on Hyper-V hosts uploads replication data for the VMs configured for replication to a storage account (known as the cache storage account, or log storage account) in your subscription. The Azure Migrate service then copies the uploaded replication data from the storage account to the replica-managed disks corresponding to the VM. The cache storage account needs to be specified while configuring replication for a VM and The Azure Migrate portal automatically creates one for the Azure Migrate project when replication is configured for the first time in the project.
Track and monitor
- When you click Replicate a Start Replication job begins.
- When the Start Replication job finishes successfully, the machines begin their initial replication to Azure.
- After initial replication finishes, delta replication begins. Incremental changes to on-premises disks are periodically replicated to Azure.
You can track job status in the portal notifications.
You can monitor replication status by clicking on Replicating servers in Azure Migrate: Server Migration. 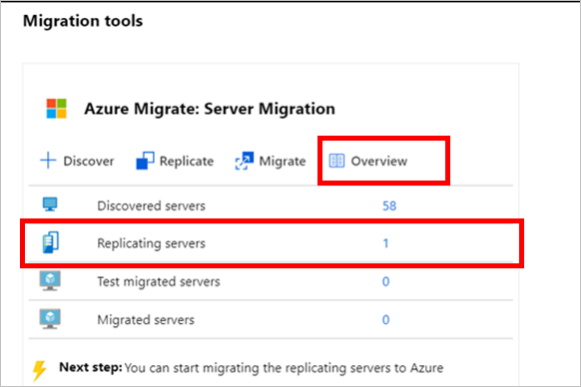
Run a test migration
When delta replication begins, you can run a test migration for the VMs, before running a full migration to Azure. We highly recommend that you do this at least once for each machine, before you migrate it.
- Running a test migration checks that migration will work as expected, without impacting the on-premises machines, which remain operational, and continue replicating.
- Test migration simulates the migration by creating an Azure VM using replicated data (usually migrating to a non-production Azure VNet in your Azure subscription).
- You can use the replicated test Azure VM to validate the migration, perform app testing, and address any issues before full migration.
Do a test migration as follows:
-
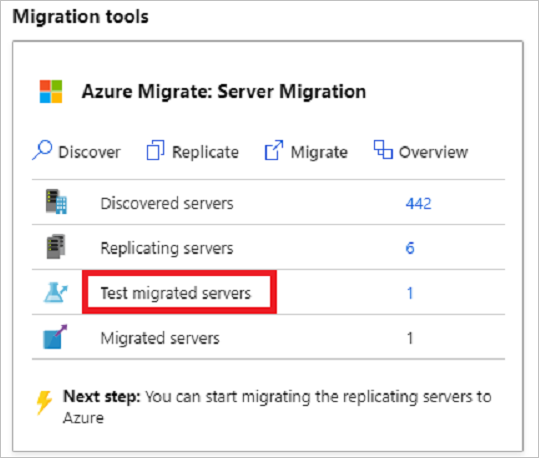
In Migration goals > Servers > Azure Migrate: Server Migration, click Test migrated servers.
-
Right-click the VM to test, and click Test migrate.

-
In Test Migration, select the Azure virtual network in which the Azure VM will be located after the migration. We recommend you use a non-production virtual network.
-
The Test migration job starts. Monitor the job in the portal notifications.
-
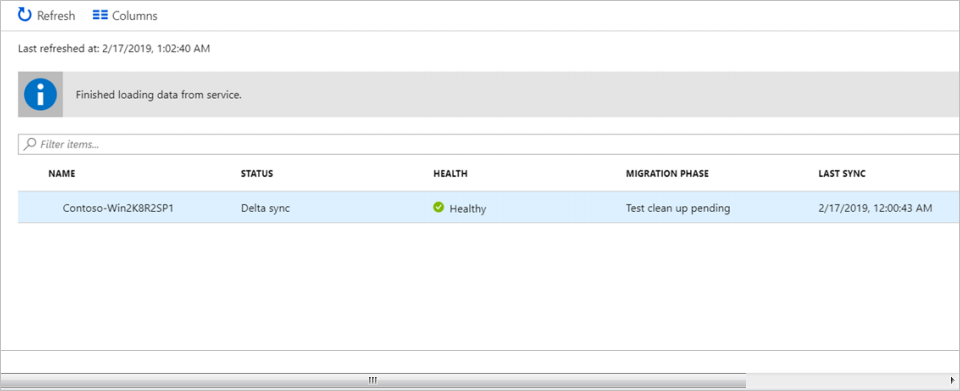
After the migration finishes, view the migrated Azure VM in Virtual Machines in the Azure portal. The machine name has a suffix -Test.
-
After the test is done, right-click the Azure VM in Replicating machines, and click Clean up test migration.
Migrate VMs
After you’ve verified that the test migration works as expected, you can migrate the on-premises machines.
-
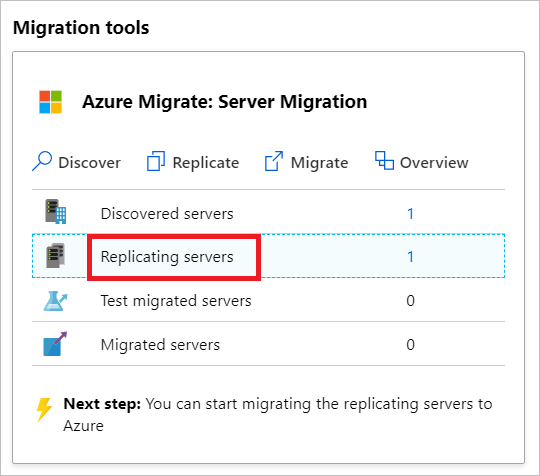
In the Azure Migrate project > Servers > Azure Migrate: Server Migration, click Replicating servers.
-
In Replicating machines, right-click the VM > Migrate.
-
In Migrate > Shut down virtual machines and perform a planned migration with no data loss, select Yes > OK.
- By default Azure Migrate shuts down the on-premises VM, and runs an on-demand replication to synchronize any VM changes that occurred since the last replication occurred. This ensures no data loss.
- If you don’t want to shut down the VM, select No
-
A migration job starts for the VM. Track the job in Azure notifications.
-
After the job finishes, you can view and manage the VM from the Virtual Machines page.
Complete the migration
- After the migration is done, right-click the VM > Stop migration. This does the following:
- Stops replication for the on-premises machine.
- Removes the machine from the Replicating servers count in Azure Migrate: Server Migration.
- Cleans up replication state information for the VM.
- Install the Azure VM Windows or Linux agent on the migrated machines.
- Perform any post-migration app tweaks, such as updating database connection strings, and web server configurations.
- Perform final application and migration acceptance testing on the migrated application now running in Azure.
- Cut over traffic to the migrated Azure VM instance.
- Remove the on-premises VMs from your local VM inventory.
- Remove the on-premises VMs from local backups.
- Update any internal documentation to show the new location and IP address of the Azure VMs.
Post-migration best practices
- For increased resilience:
- Keep data secure by backing up Azure VMs using the Azure Backup service. Learn more.
- Keep workloads running and continuously available by replicating Azure VMs to a secondary region with Site Recovery. Learn more.
- For increased security:
- For monitoring and management:
- Consider deploying Azure Cost Management to monitor resource usage and spending.
Next steps
Investigate the cloud migration journey in the Azure Cloud Adoption Framework.